
Source: This Old House, “What Is Roof Flashing?” (updated May 27, 2026), which draws its cost ranges from Angi and Fixr. National figures, not a quote.
Roof flashing installation is the part of a roofing job that decides whether the roof leaks. Flashing is the thin metal that turns water away wherever the roof is interrupted: at walls, chimneys, vents, skylights, valleys and the roof edge. Shingles shed water across the open field of the roof; flashing handles every place where the shingles stop.
This guide covers where flashing goes, how each type is installed on a shingle roof, which materials last, and the installation mistakes behind most of the leaks we trace in the Mid-South. If you are planning a new roof, our roof installation page explains how we build the whole system, flashing included.
What’s in this guide
- What flashing does
- Where flashing goes: the main types
- How roof flashing is installed, step by step
- Flashing materials and how long they last
- Flashing installation mistakes that cause leaks
- Signs your flashing has failed
- Flashing in Mid-South weather
- Repair, replace, or call us
- Roof flashing questions
What Flashing Does
Water runs downhill and follows gravity across a roof until something gets in its way. A wall, a chimney or a pipe coming through the deck creates a seam where water can run sideways or back up under the shingles. Flashing covers those seams with a lapped metal layer so the water is turned back onto the surface of the roof and keeps moving down.
On a shingle roof, flashing generally goes over the underlayment and under the shingles, so each piece is lapped like a shingle itself: the higher piece always sits on top of the lower one. On a metal roof, This Old House notes, the flashing goes on top of the panels instead. Our guide to putting on metal roofing covers how flashing is shaped to fit a panel profile.
Where Flashing Goes: The Main Types
Every roof uses several kinds of flashing, each made for one location.
| Type | Where it goes | How it is installed |
|---|---|---|
| Drip edge | Along the eaves and rakes | Metal edge that carries water off the roof and into the gutter instead of behind the fascia |
| Step flashing | Where a sloped roof runs along a side wall | L-shaped pieces woven in one at a time with each course of shingles |
| Headwall (apron) flashing | Where the top of a roof slope meets a wall | One L-shaped piece over the last shingle course, turned up the wall |
| Counter (cap) flashing | Chimneys and masonry walls | Set into the masonry and lapped over the base or step flashing |
| Valley flashing | Where two slopes meet | Metal or membrane down the valley before the shingles that meet it |
| Pipe boots | Plumbing vents and other pipes | A flanged boot slid over the pipe, lapped under the shingles above and over the ones below |
| Kick-out flashing | Bottom of every roof-to-wall run | Angled piece that throws water away from the wall and into the gutter |
Sources: This Old House, “What Is Roof Flashing?” (updated May 27, 2026); IKO, “The Roof Flashing Installation Guide” (July 13, 2025); our roof installation page.
How Roof Flashing Is Installed, Step by Step
On a full replacement or a new roof, we install flashing in the same order every time. The order matters, because each layer has to lap over the one below it.
1. Deck and ice-and-water shield
Once the deck is sound, self-adhering ice-and-water shield goes down at the eaves, in the valleys, around penetrations and along walls. That membrane is the second line of defense under the flashing at exactly the spots where driven rain and ice get in.
2. Drip edge and underlayment
Drip edge goes along the roof edges, and synthetic underlayment covers the rest of the deck. This Old House’s general contractor Tom Silva warns against nailing drip edge flat against the fascia and running the shingles flush over it; the edge has to carry water clear of the wood.
3. Valleys
Valley flashing or membrane goes in before the shingles on either slope, so the shingles lap over it and water stays in the channel.
4. Step flashing with each course
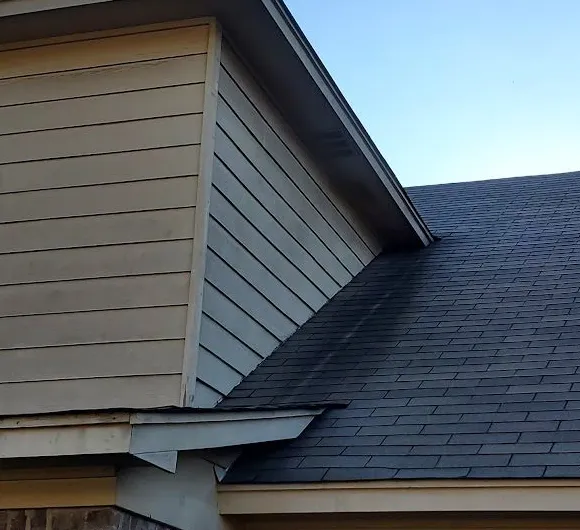
Where a slope runs along a wall, step flashing is woven in as the shingles go up: one shingle course, one piece of step flashing, the next course over it. This Old House master carpenter Norm Abram says step flashing has to go in one piece at a time and never as “a single continuous piece of flashing up the side of the roof.” A continuous strip channels water down behind itself; individual steps hand it off from one shingle to the next. Shingle maker IKO’s flashing installation guide (July 2025) adds that each step is nailed to the roof deck only, not the wall, so the two can move without tearing the flashing. The kick-out goes on at the bottom of the run before the first step.
5. Headwall, chimney and skylight flashing
At the top of a slope that dies into a wall, an apron flashing goes over the last course. Chimneys get base and step flashing against the masonry with counter flashing set into the mortar joints and lapped over it, so the chimney and roof can move independently without opening a gap. Skylights use the manufacturer’s flashing kit.
6. Pipe boots and vents
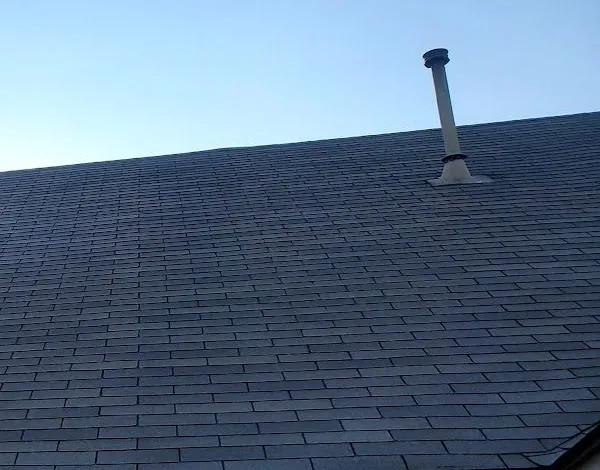
Every plumbing vent gets a new boot. The upper flange slides under the shingles above the pipe and the lower flange sits on top of the shingles below it, so water running down the roof passes over the boot rather than under it.
7. Check before it is covered
We photograph the underlayment, flashing and ventilation before the shingles cover them, so you have a record of what is under your roof. On our jobs nothing is reused: step flashing, kick-outs, pipe boots and chimney flashing are all new.
Flashing Materials and How Long They Last
| Material | Typical lifespan | Notes |
|---|---|---|
| Galvanized steel | 20–40 years | Most common and cheapest; zinc coating wears, and contact with masonry or treated wood speeds rust |
| Aluminum | 20–40 years | Light and easy to form; can corrode against masonry if unpainted |
| Stainless steel | 50+ years | Long-lived, harder to work |
| Copper | 100+ years | Durable and costly; weathers to a green patina |
| Plastic (PVC, TPO, EPDM) | Shorter than metal | Used on some boots and low-slope details |
Source: This Old House, “What Is Roof Flashing?” (updated May 27, 2026).
Mixing metals is its own problem. This Old House warns about galvanic corrosion when copper touches another metal, such as aluminum nails. Flashing and fasteners have to be compatible.
Flashing Installation Mistakes That Cause Leaks
- One long strip instead of step flashing. It looks tidy and it funnels water behind itself.
- Reusing old flashing. Bent, rusted or nail-holed flashing laid back down under new shingles carries its old leaks with it. IKO notes the general consensus among roofing professionals is that flashing should not be reused.
- Caulk in place of metal. Sealant on a moving joint is a temporary measure that fails on schedule. IKO’s guide puts it plainly: caulk is only secondary protection, in select cases.
- No kick-out. Without it, water running down a roof-to-wall joint pours behind the siding or brick at the bottom, where it rots the wall unseen.
- Laps the wrong way. Any piece that sits under the one below it instead of over it pushes water into the roof.
- Drip edge without a gap. Nailed flat to the fascia, it lets water wick back onto the wood instead of dripping into the gutter.
Signs Your Flashing Has Failed
Failed flashing rarely shows from the ground. These are the clues:
- Ceiling or wall stains near a chimney, skylight or exterior wall rather than in the middle of a room.
- A leak that only appears in wind-driven rain, which points at a wall or edge detail rather than the open roof.
- Soft or stained fascia, soffit or siding where a roof meets a wall.
- Rusted, lifted or tar-covered flashing visible at the chimney. Layers of old tar usually mean the flashing has been leaking for years.
- Cracked rubber around plumbing vents.
Water also travels before it shows, so the stain can be ten feet from the flashing that let it in. Our roof repair page explains how we work uphill from the stain to the entry point.
Flashing in Mid-South Weather
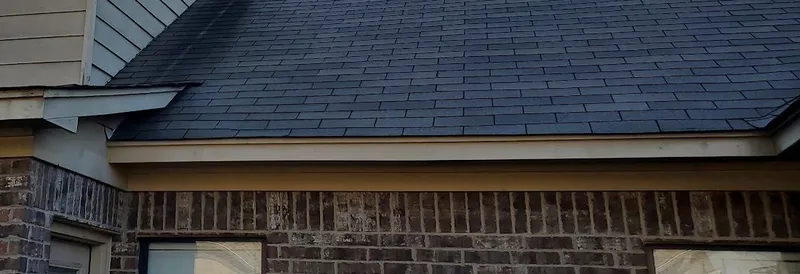
Memphis and the tri-state get straight-line winds, spring supercells and summer downpours, and wind drives rain sideways into exactly the joints flashing protects. On the roofs we are called to in the Mid-South, the leak is at a detail or a penetration far more often than in the open field of shingles.
Heat is the other factor. Summer sun cooks rubber pipe-boot collars until they crack, and roofs move with the temperature swing between August and a January freeze. Flashing that is woven in properly moves with the roof; flashing glued in place with sealant does not.
Repair, Replace, or Call Us
A cracked pipe boot or a lifted piece of step flashing on a sound roof is a repair. If flashing is failing at several details on an older roof, it usually makes more sense to flash everything new as part of a replacement, because flashing woven into shingles can’t be fully replaced without lifting the shingles around it. Our roof replacement cost guide covers what a full replacement involves.
We flash and re-flash roofs across Memphis, Bartlett, Cordova, Germantown and Collierville, Southaven, Olive Branch and Horn Lake, and West Memphis and Marion. See our roof installation page for how we build a new roof, or use the form on this page to request a free estimate.
Roof Flashing Questions
Can roof flashing be installed over existing shingles?
Some flashing, like a new pipe boot, can be fitted by lifting the shingles around it. Step flashing and headwall flashing are woven into the shingle courses, so replacing them properly means removing the shingles along that wall. Flashing that is simply nailed or glued on top of the shingles leaks.
How much does it cost to replace roof flashing?
This Old House puts flashing repair at $200 to $500 on average and replacement at $300 to $1,500, with labor around $45 to $75 an hour, citing Angi and Fixr. Chimney flashing, a steep roof or rotted decking under the joint push the price up.
Should flashing be caulked?
Caulk or roof sealant can back up a flashing detail, but it should never be the thing keeping water out. Roofs move with heat and cold, and sealant on a moving joint cracks within a few seasons. Properly lapped metal does the work.
Is step flashing required where a roof meets a wall?
Where a sloped shingle roof runs along a wall, step flashing is the standard detail, installed one piece per course. This Old House's Norm Abram calls a single continuous strip up the wall a mistake. A kick-out at the bottom of the run sends the water into the gutter.
Do you replace flashing with a new roof?
Yes. On our roof replacements and installations, step flashing, kick-out flashing, pipe boots and chimney flashing are all new. Nothing is reused.
How long does roof flashing last?
This Old House puts aluminum and galvanized steel at 20 to 40 years, stainless steel at over 50 and copper at 100 or more. Rubber pipe-boot collars usually fail long before the metal does, especially in Memphis summer sun.